3. Verify your account
Table of Contents
Congratulations on activating your own DISH Pay Now device! Let us continue with verifying your account, so you can start processing transactions as soon as possible!
Step 1 : Enter business information
Details
Go to the “Business” section.
Fill in the Establishment Details:
• Establishment Name: Enter the name of your business.
• Phone Number: Provide your contact phone number.
• Website: Add the URL of your business website. (If you do not have your own website please insert: dish.co as a placeholder)
• Address: Enter the street address, city, postal code, and select the country.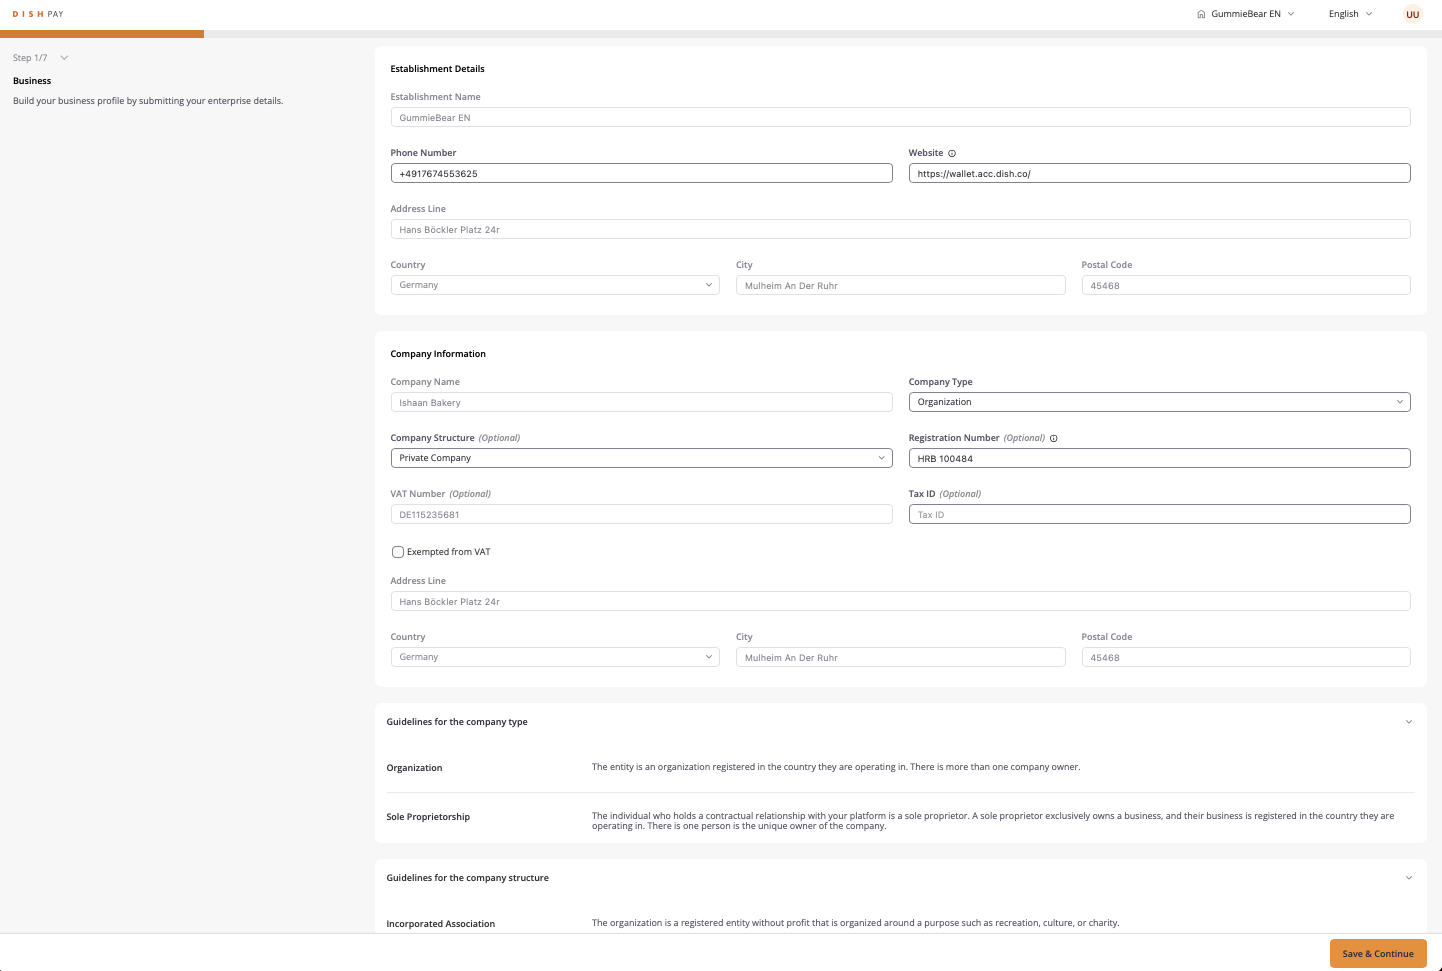
Step 1.1 : Company information
Details
In Company Information, complete the following fields:
• Company Name: Provide the registered name of your company.
• Company Type: Select the type (e.g., Organization).
• Company Structure: Choose the structure (e.g., Private Company).
• Registration Number: Add the official registration number, if applicable.
• VAT Number: Input the VAT number if available.
• Tax ID: Enter your Tax ID, if applicable.
Select Save & Continue to move to the next step.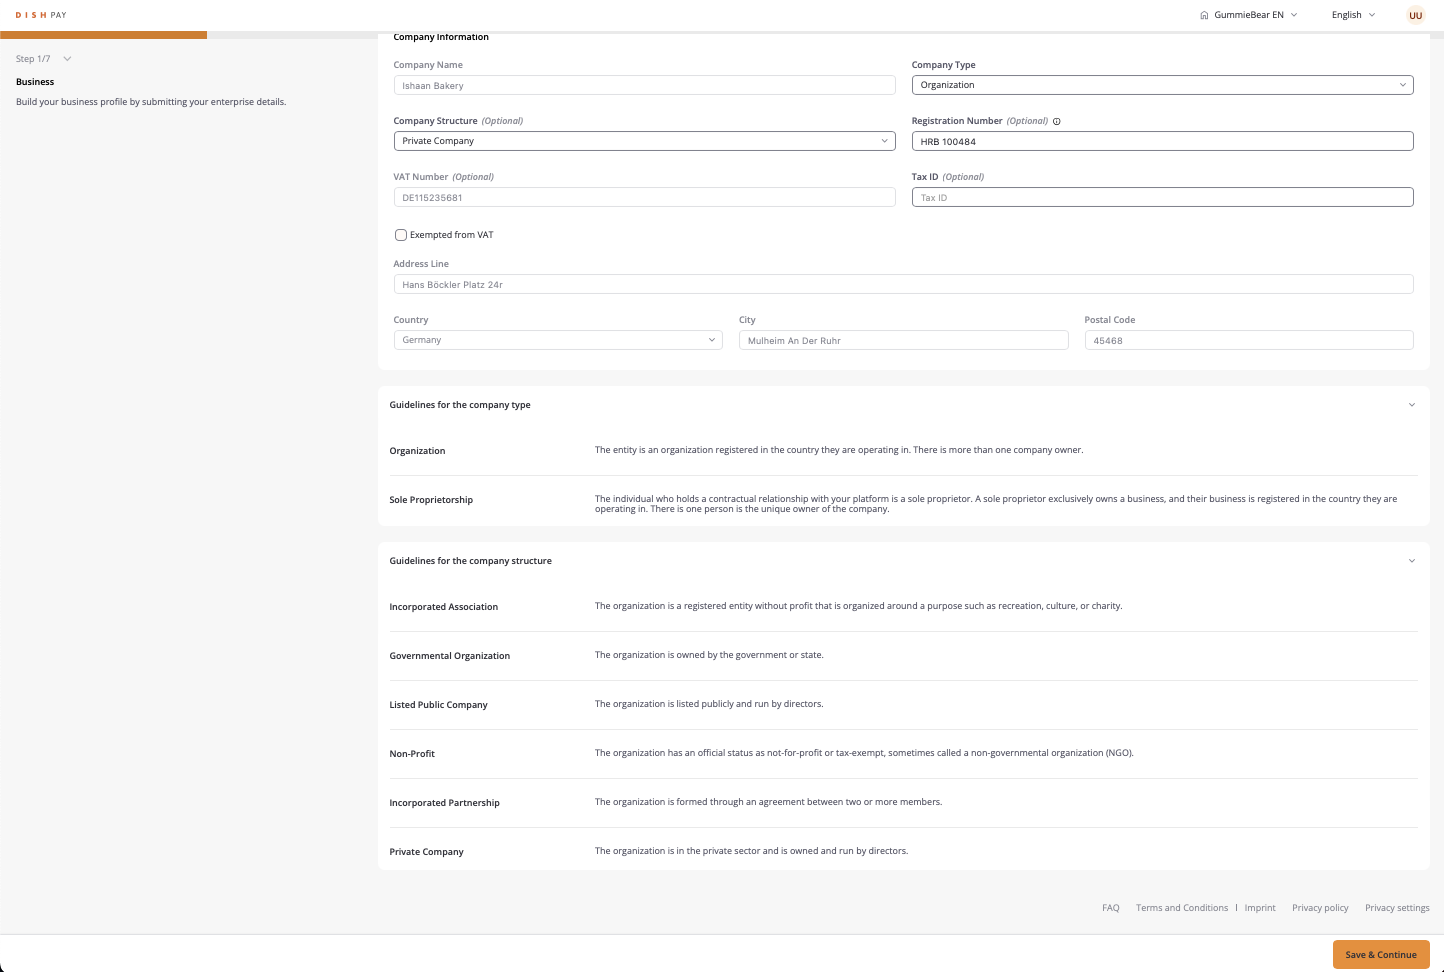
Step 1.2 : Add account details
Details
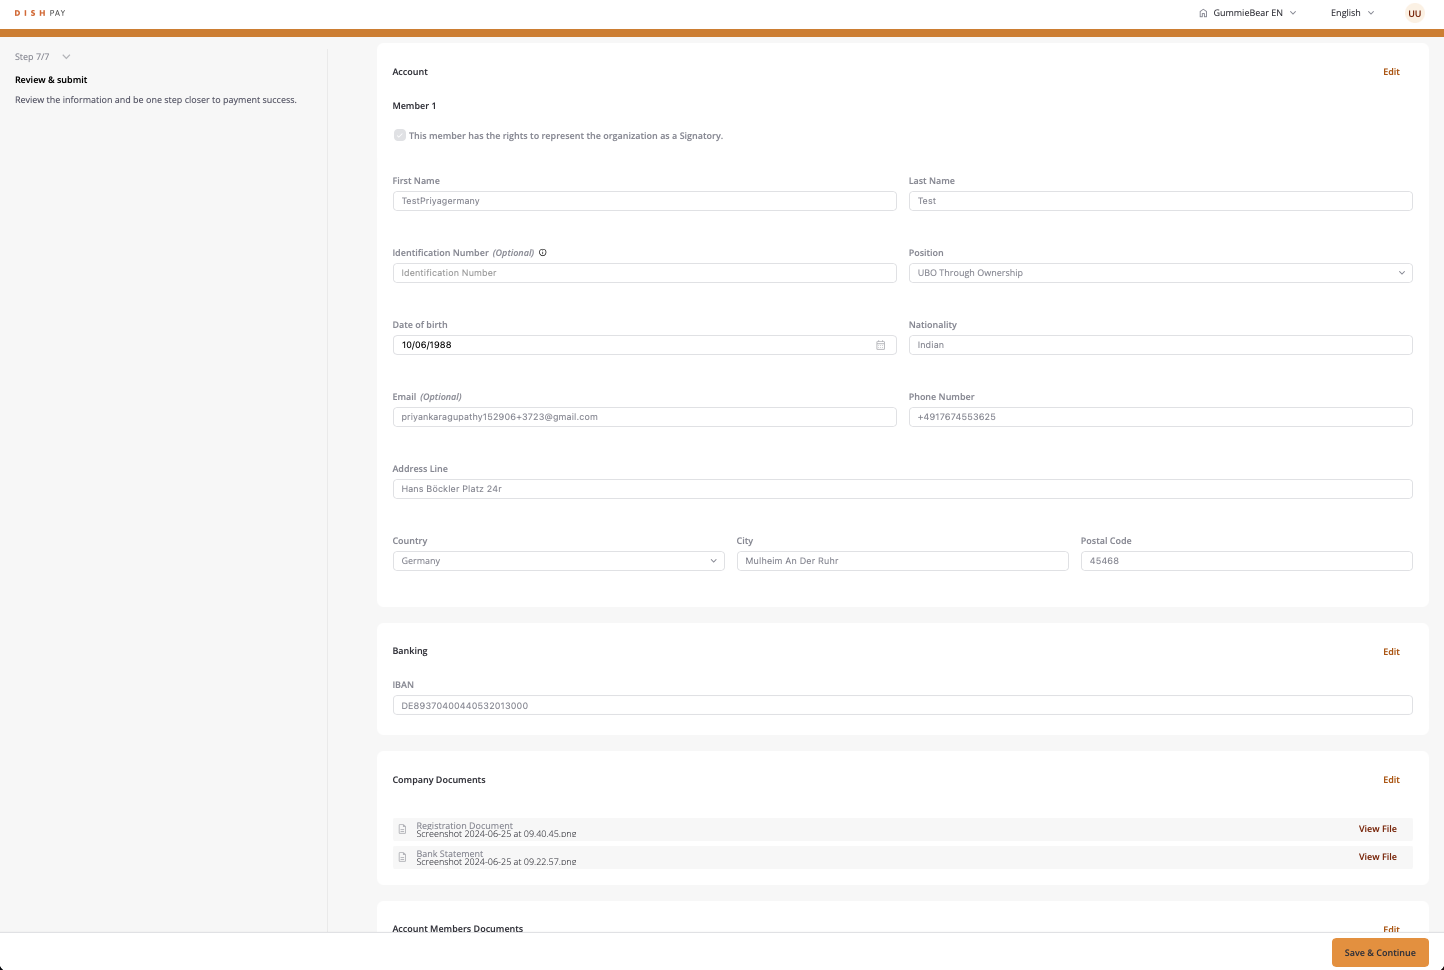
1. Navigate to the “Account” section.
2. Enter Account Details:
• Member Information: Fill in personal details for each member with signing rights.
• First Name and Last Name: Enter the member’s name.
• Identification Number: Optional, but add if applicable. (ID or passport number)
• Position: Select the position (e.g., UBO Through Ownership).
• Nationality and Date of Birth: Specify nationality and birthdate.
• Email: Provide the member’s email.
• Phone Number: Enter the contact phone number.
• Address: Fill in the address, city, and postal code.
3. Select Save & Continue after completing the information.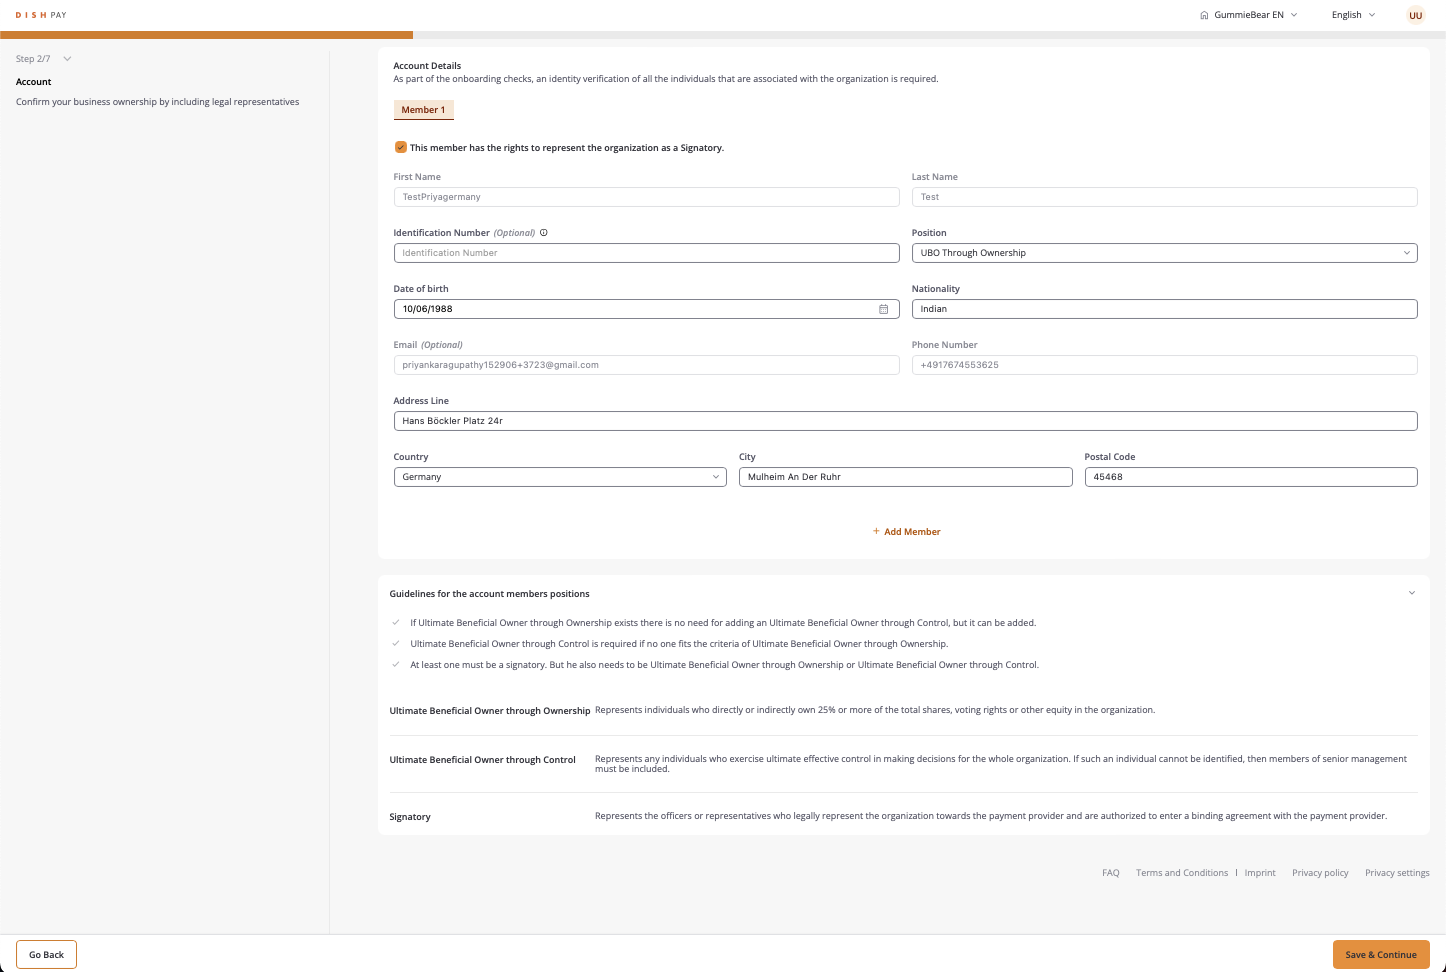
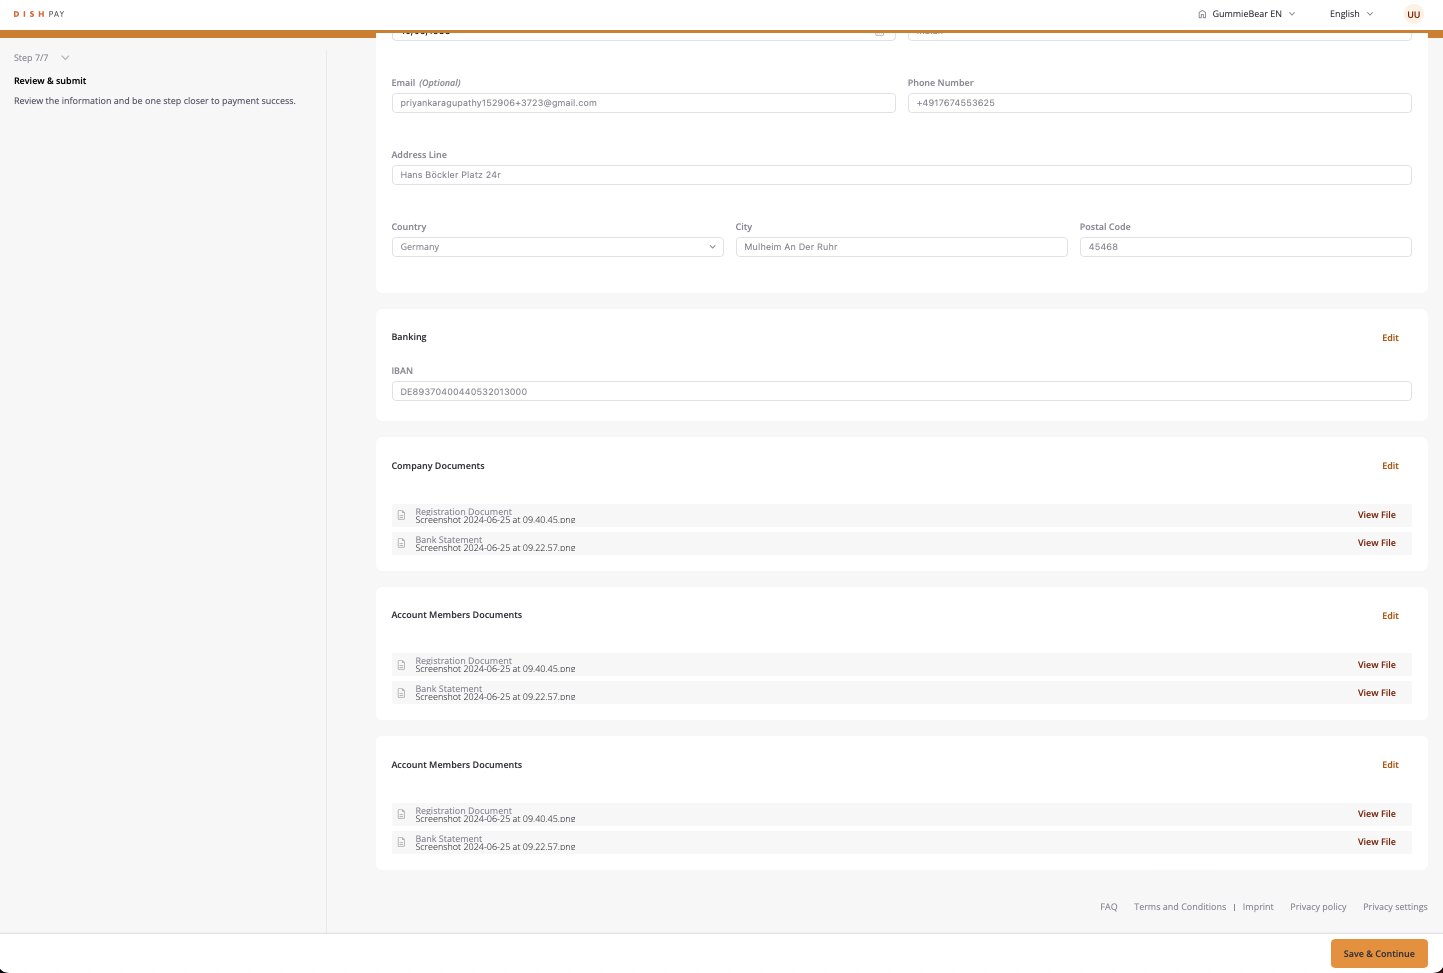
Step 1.3 : Link banking information
Details
1. Go to the “Banking” section.
2. Enter your IBAN to link your company’s bank account for transactions.
3. Select Save & Continue to proceed.
Step 2 : Upload company documents
Details
1. In the “Documents” section, upload relevant legal documents.
2. Select Document Type from the dropdown (e.g., Registration Document).
3. Upload your document file. Ensure it meets the format requirements:
• Allowed Formats: JPEG, JPG, PNG, or PDF.
• Size Limits: Minimum 1 KB, Maximum 4 MB. (If documents are too small convert to PDF)
4. Select Save & Continue to proceed.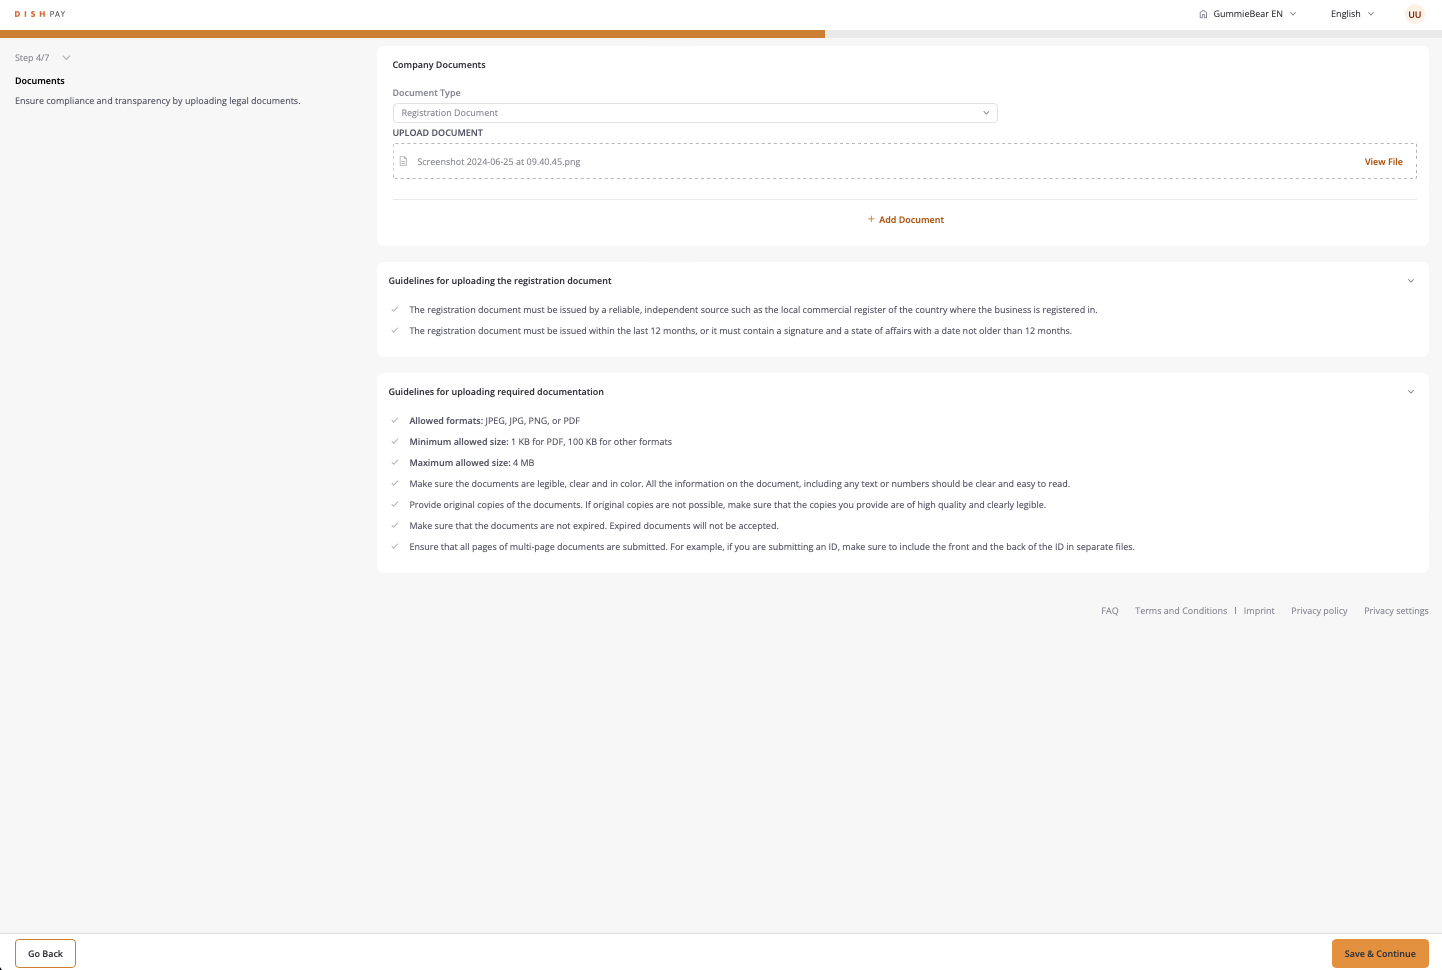
5. The system will review the document uploaded and compare it with the details you entered in the previous steps.

Step 2.1 : Upload bank statements
Details
1. Select Document Type as “Bank Statement.”
2. Upload the file with your bank statement.
(If documents are too small convert to PDF)
3. Ensure the document includes the following details:
• Account Holder Name
• IBAN or Bank Account Number (no spaces between the numbers)
• Issue Date (within the last 12 months)
4. Select Save & Continue once complete.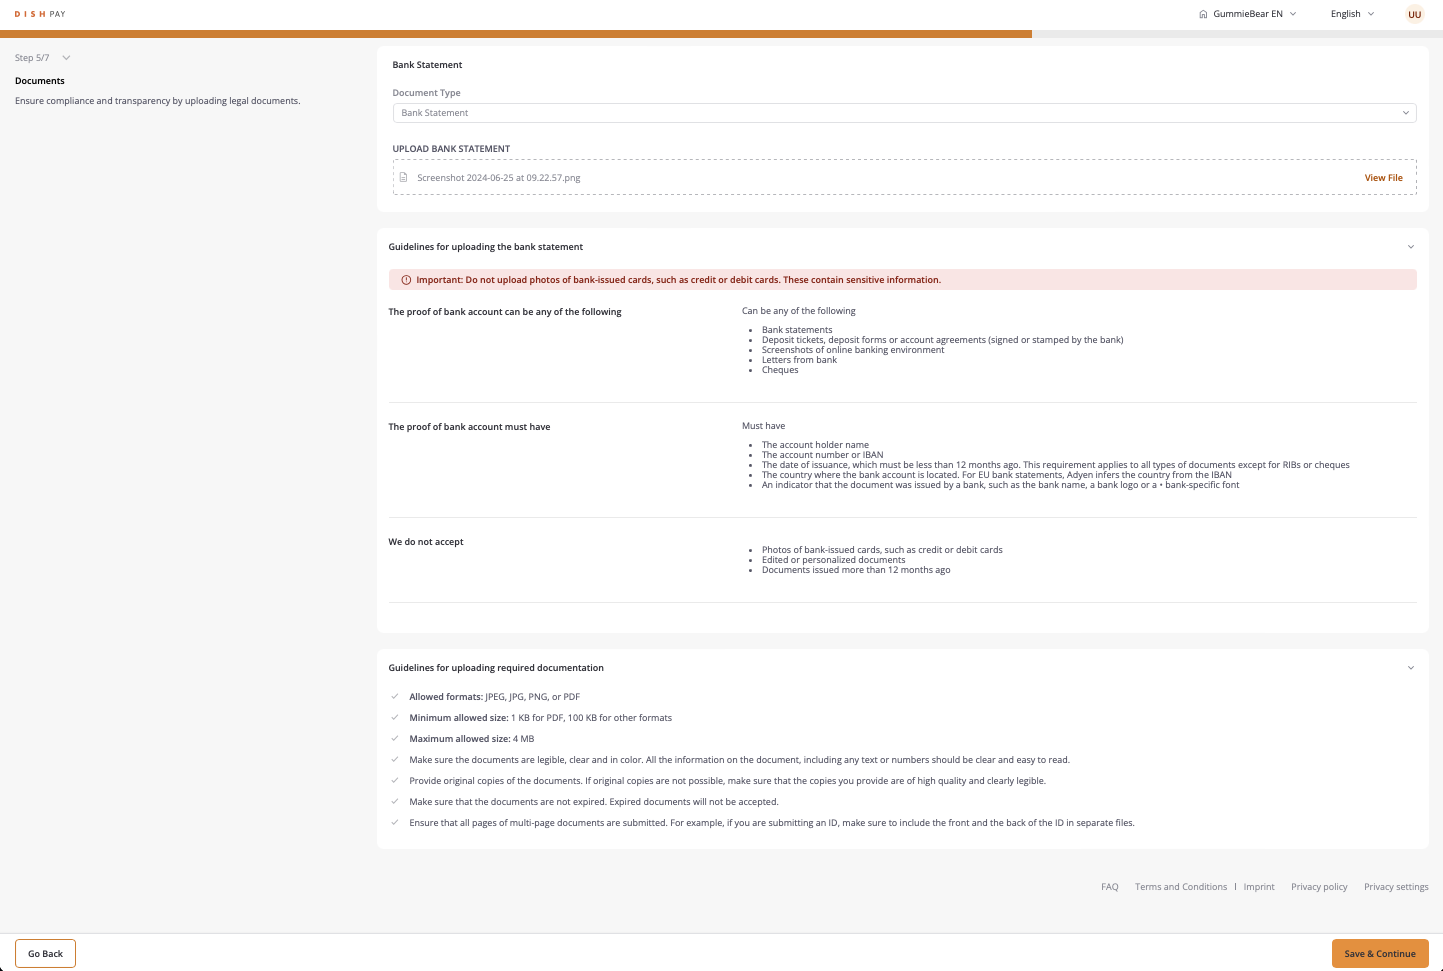
5. The system will review the document uploaded and compare it with the details you entered in the previous steps.

Step 2.2 : Add account member documents
Details
1. For each account member, upload the required documents, such as a copy of an ID or passport.
2. Select Document Type from the dropdown.
3. Upload the file, following the size and format guidelines.
(If documents are too small convert to PDF)
4. Select Save & Continue when ready.
5. The system will review the document uploaded and compare it with the details you entered in the previous steps.
Step 3 : Review & submit
Details
1. Carefully review all entered details and uploaded documents in the Review & Submit section.
2. If everything is correct, select Save & Continue to finalize the onboarding process.
You are done! Congratulations on finishing the account verification process! You can now continue your DISH Pay Now onboarding journey with the next step, "Complete device onboarding", by clicking here.